
Here are "the goods" once I removed the numerous 3 1/2" nails and cut-off any bad end sections. At least some of the ends with nail holes were in good condition . . . (I love the vacant nail holes left in the wood for extra character.)

A bonus was that one of the planks had an old, loose (and rusted in place) latching hardware fixture. I knew I wanted to showcase that element on the completed piece.
 |
| The show-cased hardware on the finished shelf unit. |
Well, here it is. Not too bad for a very "un-carpenterish" guy like myself (" . . . Don't you remember you told me you loved me baby")
 |
| The front "apron" piece extends beyond the overall width (read more below). |

Just some quick stats:
I cut (4) horizontal, shelf pieces at 3 feet and (4) vertical, side pieces at 4 feet. I created my horizontal shelves first by laying two of the 3 feet sections side by side (to add depth to the shelf) and connected or braced them together with scrap pieces of wood about 3 inches in from either end.
I did this similarly for all "sections" I created and then merely attached them together. Yes, I say merely as though it was breeze but this project took me a good four hours to do. (Pathetic, I know . . . and the carpenters on HGTV can case 8 windows, build a custom, built-in shelving unit and cut floor trim molding in a 1/2 hour show! I'm so envious of their skills!!!)
OK, Back to attaching them. Where the sides attach to the top I used both "L" shaped brackets and corner blocks of wood. I screwed through the corner block into the top and into the sides. For the lower shelf, I again used blocks of wood which are simply screwed into the sides. These shelves simply rest on the blocks and are removable.
The wood plank with the hardware was used as an apron piece, spanning the front, top shelf. I elected to leave this one piece of wood longer than the overall width of the shelf as both ends had such great character I didn't want to lose with a clean saw-cut. This extending piece also hides the other clean saw-cuts of the other pieces and where they connect.
Oh . . . and I added a "V" notch to the bottom of the side pieces with a jigsaw to create "legs".
Here it is staged at the front entry.
 |
| A simple mix of items with a bit of rustic charm. Don't you just love that chippy, white paint?! |
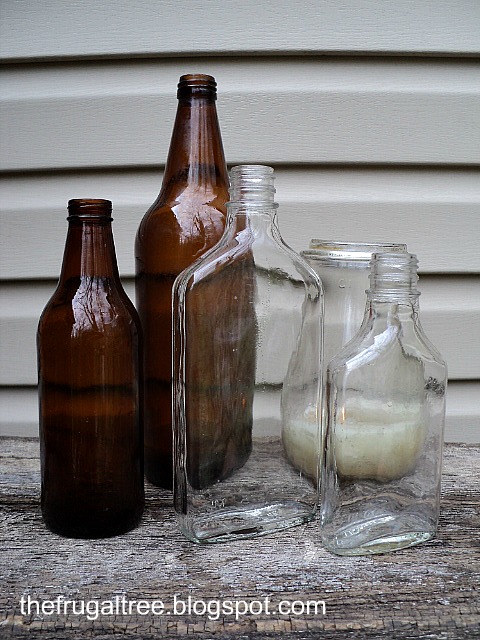 |
| Old bottles I found while "good-deed" cleaning my road. |
 |
| Old watering cans are just too cool! |
 |
| A shabby lantern made from left-over. miscellaneous materials. |
 |
| An iron doormat borrowed from my mother for one of my holiday displays. Umm, maybe I can keep it awhile longer? |
 |
| The corner displaying my upcycled chimney pot with cool, twisty branches and filled with stones. |
I sorta want to seal the shelf from the elements but don't want to change its appearance. Any suggestions on a good product to use? I have an oil-penetrating, clear-coat, deck sealer which I applied to the underside of one of the shelves but it made the wood darker. I prefer the dry, weathered and faded look of the wood and don't want to lose that (too much). If I can't figure something out, this piece will be making its way indoors as a hallway console table. I really like it outside though. Thoughts?
Sharing this at:
Wednesday
Very Merry Vintage Style - Share the Love Wednesday
Restore Interiors - Restored It Wednesday
Primitive & Proper - Piece of Work Wednesday
Someday Crafts - Whatever Goes Wednesday
Savvy Southern Style - Wow Us Wednesday
Ginger Snap Crafts - Wow Me Wednesday
Thursday
The Brambleberry Cottage - Time Travel Thursday
The Shabby Creek Cottage - Transformation Thursday
Somewhat Simple - Strut Your Stuff Thursday
House of Hepworths - Hookin Up With HOH Thursdays
Friday
Happy Hour Projects - Freestyle Friday
Common Ground - Vintage Inspiration
At The Picket Fence - Inspiration Friday
The Shabby Nest - Frugal Friday
REDOUX - Friday Link Up Party
The Charm of Home - Home Sweet Home
Chic on a Shoestring Decorating - Flaunt it Friday
Saturday
Funky Junk Interiors - Sat Nite Special
Be Different, Act Normal - Show and Tell Saturday
Tatertots & Jello - Weekend Wrap Up Party
Dear Frugal another beautiful use for reclaimed "chippy wood" looks amazing with your vintage glass artifacts, makes a nice statement of view! in re: to a protective coating, try AquaZAR water-based polyurethane, clear satin..it may be an option worth looking into:)
ReplyDeleteThanks for your recommendation NonnaG!!!
DeleteHey John, your blog totally rocks. So happy to have found it. I'm here from Kim's party and I'm your newest follower. I'm also not far from York - I live in Jersey just over the bridge from Philadelphia. Gonna go browse around your blog some more.
ReplyDeleteHave a great day.
Kim
Hi Kim! Thanks for your "rockin" comment! Glad to have another "local" follower!
DeleteLove love love! The staging is perfect too! New follower!
ReplyDeleteThanks for stopping by Abby. I'm always delighted to have a new follower! Thanks for the "Love"!
Deletewhat a great shelf for displays or potting. great idea!
ReplyDeleteI made it for potting and plant displays so you are right on target with my original intentions.
Deletei love the look and it is so perfect for outside!
ReplyDeleteThanks Cassie. Appreciate your nice comment!
DeleteWhat a great use of reclaimed wood. I agree with your decision of not cutting the front piece, as the ends have such beautiful character. I hope you find a sealant that works ~ I think this makes a nice statement in the front of your home. You have such a knack for staging! Love the pieces you've chose to display with this old, rich wood.
ReplyDeleteThanks Sherry. I think I need two of them. One for outdoors and one for in!
DeleteWonderful! Thank you for joining me at Home Sweet Home!
ReplyDeleteSherry
Lots of Good information in your post, I favorited your blog post so I can visit again in the future, Thanks.
ReplyDeleteHI John, I've just discovered your blog - love it!! I think I'm going in search of some rustic wooden planks to make my own entrance table, perhaps with a door ontop (if I'm lucky enough to find one). I look forward to seeing your new designs.
ReplyDeleteFrom your newest follower in Australia.