Showing posts with label Reclaimed Materials. Show all posts

Monday, August 20, 2012

Repurposed Wrought Iron Gate

Rusty Love.

I found an old gate (actually a pair that meet in the middle - how cool!) in my woods. They were laying in the ground, half buried in earth and practically smothered under vine and vegetation. With a bit of effort I was able to free them and get a gander at their vintage beauty and aged patina.


Gate used as outdoor decor two years ago.  Oh and a repurposed chimney pot (topper) for a planter!
(That deck is now stained dark espresso.  I forgot how bad it looked.  Sheesh!)

I repurposed the gates as landscape decor for awhile and then moved them into the garage during the winter to save them further hardship from the elements.  They were rusting away like crazy.  The black finish was peeling and crumbling off from the slightest touch or movement of the gates.  They have been in-hiding (in the garage) for a year, but never-out-of-mind (my mind that is).

Rustic Window Treatment?

Yesterday I decided to clean one up enough to bring indoors.  Boy, it was a lot of work scraping off the peeling finish and rubbing like mad with a wire brush to get the loose "debris" off.  A burst of air from the leaf blower to get any remaining dust off and it was ready for a new purpose!

I love the look of RUST and that is what I was left with  . .  . some great surface pitting too!


Pitted Perfection.

I had a master plan for these gates (well, one of them at least).  I would repurpose it as a window treatment.  Now hear me out.  There is a practical reason for this.  Personally, I'm not a huge fan of draperies or window treatments, and when able, will opt for "open" windows.


A view from outside.  Ya think the birds will see it?

My large picture window was apparently loved by my feathered friends..  They loved it so much in fact that they would often fly right into it to give it a kiss (poor little guys).  No fatalities seen but a few who undoubtedly saw stars.  In an effort to warn them of the glass, I came up with this solution.  Hopefully it works.  I haven't heard any BANGS! yet today.  It will take me a while to get used to it.  I'm not warming up to it quickly as I miss the unobstructed OPEN VIEW, but at least it doesn't restrict the light too much.

So, good idea, bad idea, what do ya think?


Friday, March 23, 2012

A Rustic Vignette

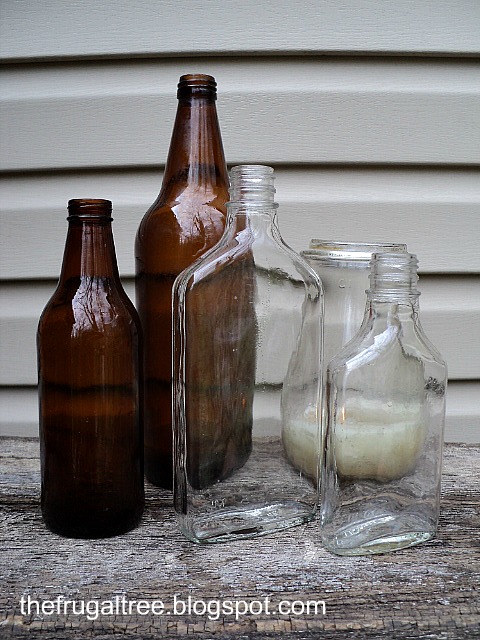
Well yesterday found me trekking through the woods at my parent's property in search of vintage bottles. A large tree had fallen late last year during a winter storm, uncovering a hidden trove of buried bottles in the wake of its rooted mass. I came home with over a dozen of various sized and shaped medicine and/or liquor bottles. Most still had rusty caps intact with scary substances lingering within.

Some of the reclaimed bottles, cleaned and basking in the drying sunlight.

I brought my "prized finds" home and commenced on removing cabs, dumping contents and cleaning bottles. Wow, what a chore that was. The caps so rusty, they were easily removed by pushing a nail through the center and prying off broken pieces, but getting some of the bottles cleaned-up proved problematic. Quite an ensemble of experimental cleaning products lined the garage for usage. If one failed, the next was tried. Vinegar and baking soda, rock salt, bleach with dish detergent in warm water, some super de-greaser by Prestone (automotive), Goo Gone. Eventually, all the "ickiness" was removed. A narrow paint brush and toothbrush alike helped a bit with the interiors too. Wish they were a bit more bendy at times however. They all received a second cleaning once back inside my home.

While the bottle were drying, I decided to make another rustic, decorative box from weathered pallet wood I had found. This time, a flat piece of rusty, galvanized steel was used to "badge" the front of the box. Another piece of salvaged metal formed a clamp to hold it in place. I was going to add some text to the badge but decided to leave it simple since the box could have so many varied uses. I initially thought it would be cool for displaying hand-made soaps and saying "SOAP" across the metal. Now that it's complete, I'm actually glad I chose to go "nondescript".


I decided to create a small vignette with my new box and one of my newly found and cleansed bottles. Since this bottle had a threaded top, I decided to mask them with a burlap wrap clamped in place with more scrap metal.


To finish off the look I added one of my steam-punk inspired metal orbs made from numerous broken pieces of rusty, metal springs.


I love a grouping of three and this simple ensemble just worked together so nicely. 


A trio of elements.

The completed ensemble.

Now I'm in the mood to do a few more, perhaps with a variance of included items. I'm definitely enjoying creating these rustic pallet boxes and since it's such a nice, sunny day, I can see myself outside doing a few more. Until next time . . . ENJOY!


Sharing this at:

Happy Hour Projects - Freestyle Friday
Chic on a Shoestring Decorating - Flaunt It Friday
My Uncommon Slice of Suburbia - Tuesdays Treasures
Coastal Charm - Nifty Thrifty Tuesday
At Home With K - Terrific Under Ten Tuesday
Kammy's Korner - Trash 2 Treasure Tuesday
Debbie Does Creations - Toot Your Horn Tuesday
Home Stories A2Z - Tutorials & Tips Party
Cherished Handmade Treasures - Creative Corner Hop
The Shabby Creek Cottage - Transformation Thursday
The Brambleberry Cottage - Time Travel Thursday

Monday, March 19, 2012

Free Outdoor Decor

I love cool and trendy outdoor decor as much as the next person and will be sharing some of my prior purchases and finds in an upcoming post. However, yard and garden decor can get a bit pricey and too much of it can make your property go from classy to trashy (O.K. that's harsh but it rhymes!)

Try to go frugal and introduce some free "decor" to your yard. Old, rusty elements of some sort make unique, sculptural displays. They also tend to coordinate seamlessly with natural surroundings. See what items people are throwing away. You may be able to repurpose them.

Shapely branches, limbs, tree roots and tree bark add a nice, organic touch to your landscaping. A grouping of rocks also adds interest and demands attention among any store bought elements you may elect to add. Creating vignettes outdoors isn't much different than indoors. You just have a bit more space to play with. Thoughtful groupings of elements will create a bigger impact than spacing things separately here and there. So, grab a neat branch or two, a few rocks and place them as a back drop or accompaniment to that mosaic snail or turtle sculpture.

Reclaimed Rusty Objects Become Outdoor Decor

Old rusty metal hoops (at right) along with a paint can make a unique statement.
Random sections of old stove pipe are grouped together (left).


The stove pipe collar collection.  Industrial-organic chic?

Numerous sized paint and coffee cans create a tower of rusty coolness.

A large barrel will later become a great base for a large potted plant or perhaps a bar height table.

A unified look of common elements.

Old hollowed and dried branches group nicely.  A repurposed stair rail post is topped with a
carved dragonfly from a craft show I attended numerous years ago.

A lot of free elements from trees are seen here.
Bark, branches, root and log sections  provide form and function.

Bark adds interest and helps keep mulch in place on steep landscaped areas.

An interesting, inverted tree root is joined by a couple of varying-style rocks to create this focal point.


Sharing this at:

Monday
Sumo's Sweet Stuff - Market Yourself Monday
Keeping It Simple - Motivate Me Monday

Tuesday
Coastal Charm - Nifty Thrifty Tuesday

Wednesday, March 14, 2012

Chippy Paint Rustic Shelf

As you may recall, my last adventure yielded some old, skid wood which I salvaged and turned into a rustic box. What I didn't tell you is that I also found some "authentic", chippy-paint, wood planks.   I left them there and returned a few days later to stake my claim!  After three treks back and forth through the woods, all the planks were home. What a fun work-out on a sunny and warm Spring-like day!

Here are "the goods" once I removed the numerous 3 1/2" nails and cut-off any bad end sections. At least some of the ends with nail holes were in good condition . . . (I love the vacant nail holes left in the wood for extra character.)


A bonus was that one of the planks had an old, loose (and rusted in place) latching hardware fixture. I knew I wanted to showcase that element on the completed piece.


The show-cased hardware on the finished shelf unit.

Well, here it is. Not too bad for a very "un-carpenterish" guy like myself  (" . . . Don't you remember you told me you loved me baby")


The front "apron" piece extends beyond the overall width (read more below).


Just some quick stats:

I cut (4) horizontal, shelf pieces at 3 feet and (4) vertical, side pieces at 4 feet. I created my horizontal shelves first by laying two of the 3 feet sections side by side (to add depth to the shelf) and connected or braced them together with scrap pieces of wood about 3 inches in from either end.

I did this similarly for all "sections" I created and then merely attached them together. Yes, I say merely as though it was breeze but this project took me a good four hours to do. (Pathetic, I know . . . and the carpenters on HGTV can case 8 windows, build a custom, built-in shelving unit and cut floor trim molding in a 1/2 hour show!  I'm so envious of their skills!!!)

OK, Back to attaching them. Where the sides attach to the top I used both "L" shaped brackets and corner blocks of wood. I screwed through the corner block into the top and into the sides. For the lower shelf, I again used blocks of wood which are simply screwed into the sides. These shelves simply rest on the blocks and are removable.

The wood plank with the hardware was used as an apron piece, spanning the front, top shelf. I elected to leave this one piece of wood longer than the overall width of the shelf as both ends had such great character I didn't want to lose with a clean saw-cut.  This extending piece also hides the other clean saw-cuts of the other pieces and where they connect.

Oh . . . and I added a "V" notch to the bottom of the side pieces with a jigsaw to create "legs".


Here it is staged at the front entry.

A simple mix of items with a bit of rustic charm.
Don't you just love that chippy, white paint?!

Old bottles I found while "good-deed" cleaning my road.

Old watering cans are just too cool!

A shabby lantern made from left-over. miscellaneous materials.


An iron doormat borrowed from my mother for one of my holiday displays.
Umm, maybe I can keep it awhile longer?  

The corner displaying my upcycled chimney pot with cool, twisty branches and filled with stones.

I sorta want to seal the shelf from the elements but don't want to change its appearance. Any suggestions on a good product to use? I have an oil-penetrating, clear-coat, deck sealer which I applied to the underside of one of the shelves but it made the wood darker.  I prefer the dry, weathered and faded look of the wood and don't want to lose that (too much). If I can't figure something out, this piece will be making its way indoors as a hallway console table. I really like it outside though. Thoughts?


Sharing this at:


Wednesday
Very Merry Vintage Style - Share the Love Wednesday
Restore Interiors - Restored It Wednesday
Primitive & Proper - Piece of Work Wednesday
Someday Crafts - Whatever Goes Wednesday
Savvy Southern Style - Wow Us Wednesday
Ginger Snap Crafts - Wow Me Wednesday


Thursday
The Brambleberry Cottage - Time Travel Thursday
The Shabby Creek Cottage - Transformation Thursday
Somewhat Simple - Strut Your Stuff Thursday
House of Hepworths - Hookin Up With HOH Thursdays


Friday
Happy Hour Projects - Freestyle Friday
Common Ground - Vintage Inspiration
At The Picket Fence - Inspiration Friday
The Shabby Nest - Frugal Friday
REDOUX - Friday Link Up Party
The Charm of Home - Home Sweet Home
Chic on a Shoestring Decorating - Flaunt it Friday

Saturday
Funky Junk Interiors - Sat Nite Special
Be Different, Act Normal - Show and Tell Saturday
Tatertots & Jello - Weekend Wrap Up Party

Saturday, March 10, 2012

Weathered Skid to Rustic Box

Well I guess I've been busy as my posts have been sadly lacking lately. First off I must give a big THANK YOU to two fellow bloggers. Suzy at Worthing Court featured ME last week on her blog and did such a wonderful write-up. I'm still beaming from her efforts. You can read the post here as well as peruse some of her personal, frugal, decorating ideas.

Likewise, Tiki at Ribbons, Lace, and Inspiration chose me as a "new" recipient of the Leibster Award. Thank you Tiki!!! She is another fan of frugal decorating who knows how to design on a budget.

So what have I done lately? Well, I've been collecting not METAL as I had been but instead, WOOD. Yes, numerous types of wood. I took a trip down to the river on a gorgeous Sunday last weekend and brought home numerous pieces of drift wood which I'll be turning into art projects of some sort.

The past two days had me trekking through the woods to a spot where somebody dumped some old skids. These skids must have been sun-baking in this spot for quite some time. I love sun-dried tomatoes and I must admit, I now love sun-dried skids! The wood is super for rustic projects such as the one I completed this morning. This project took me about an hour and I'm so pleased with it. It WAS to be an ETSY project for my store but once again, like with other creations I've made for ETSY, I may find it hard to part with. Guess I'll have to make MORE!!!


Here are some of the weathered boards I removed from the skids . . .
. . . my raw materials for this project.


And here is the simple, rustic box after cutting the boards to size and attaching them.


Hmmmm, what about a cool, rusty metal embellishment?


Love it!


Now, let's see . . . how can I display this new box? 


 Ah yes, soaps and wash clothes.


So, here is sits in its new home beside the main bath sink. I jostled some items around to make room for it and am happy to say it will be staying like this for quite awhile. Yep, guess that means this "intended Etsy item" is not For Sale . . . (at least not yet). :-)

Thanks for stopping by!!!


Sharing this at:
Funky Junk Interiors - Sat Nite Special
Be Different, Act Normal - Show and Tell Saturday
Tatertots & Jello - Weekend Wrap Up Party
Keeping It Simple - Motivate Me Monday
Homemaker on a Dime - Creative Bloggers Party & Hop
DIY ShowOff - DIY Project Parade Linky Party
Sumo's Sweet Stuff - Market Yourself Monday
Coastal Charm - Nifty Thrifty Tuesday
At Home With K - Terrific Under Ten Tuesday
Sassy Sites - Trash to Treasure Tuesday
My Uncommon Slice of Suburbia - Tuesday Treasures
Happy Hour Projects - Freestyle Friday
Common Ground - Vintage Inspiration
At The Picket Fence - Inspiration Friday
The Shabby Nest - Frugal Friday

Friday, February 24, 2012

French Revival?

The nod toward French inspiration is everywhere lately. Eiffel Tower images, fleur de lis motifs and French script, text and phrases. I've always been a fan of the fleur de lis and have more of them than I'd like to admit floating around the premises however this French revival or influence has taken hold of me yet again.

I'm becoming a fan of fonts and text on decorative accessories such as throw pillows and table runners to name a few. Roman and Arabic numerals are WAY cool and have influenced a few of my projects lately too,  but back to "Le Francais".

Simple, one-word "phrases" in French are hip, cool and trendy. So, here's my first attempt at a "Frugal Tree-inspired", French "phrase".

Vertes = Green, as in "GO GREEN", ECO, Trees, Upcycling, Recycling, etc . . . 

A plain, reclaimed plate was given a boost of character with a stencil set, some Martha Stewart satin acrylic craft paint in vanilla bean (a great color!) and finished with some Valspar flat clear sealer.


I used a sponge brush to dab the paint into the stencil.  I wanted a distressed look so left some areas devoid of paint.  The matte clear-coat removed the previously shiny finish from the plate and gave it a look similar to stoneware - - - a bonus for that Old World feel.

Displaying some highly relevant, GREEN moss balls!

I made this for my shop but heck, I'm liking it so much I may have to make a few more (for myself!). Hmmm, what "Frenchy-words" shall I use next?


Sharing this at:
The Shabby Nest - Frugal Friday
Common Ground - Vintage Inspiration
At The Picket Fence - Inspiration Friday
Chic on a Shoestring Decorating - Flaunt It Friday

Friday, February 17, 2012

Creating a Mini Topiary Accent

This past Winter, over the holiday season, I decided to make a topiary from grapevine for the entry. I actually made two and they are currently packed away, awaiting this year's holiday season. Yes, I liked them so much I know I'll be using them again.

I kicked around the idea of bringing at least one indoors to use year-round but they are a bit large so I decided against it. During a "thrift-hunt" I found some old, terra-cotta urns that used to house a candle. I've also been seeing a lot of faux-moss covered items such as stones, wreathes, spheres, etc trending in the decorating world and am liking that look quite a bit. It is especially appropriate for the welcoming of Spring with its bright green hues. Yes, I guess I'm thinking Spring a bit early but this wacky weather here in PA says "SPRING" today so we'll just go with it.

So with a small urn-type pedestal and a Styrofoam ball, I decided to make my own indoor topiary accent.

BEFORE

The urns were a bit blah and dirty so I cleaned them up and gave them a white-wash treatment over the charcoal base color.

AFTER

The Styrofoam ball was from Dollar Tree and is 4" diameter I believe. The Spanish moss was also purchased there and is a great, green color rather than the gray-green hued Spanish moss that you typically see. They actually had numerous moss colors available at this particular location.

I painted the Styrofoam ball with a mix of green acrylic paints to mask the white color from showing through any gaps in the moss coverage to follow. Once dry, I applied the moss.

TIP: A two-pack of cheap, aluminum, rectangular pans are great for projects such as this and I reuse them over and over.

 In one pan I placed out a thin layer of the moss, working it out flat like a blanket (so to speak). The other pan was used for spraying the ball with spray adhesive. I wore latex gloves to keep the adhesive off my hands. After the adhesive got tacky (about 30 seconds), I placed the ball right in the center of the moss layer and began wrapping the moss up and over it. I then picked it up and began squeezing the moss tightly and pushing it onto areas of the ball that were showing through. I let it set-up a few minutes and then for extra security, I began wrapping the sphere (ball) with some thin, green thread. I spiraled it all around the ball a few times to help hold the moss in place.


Once done, I placed the moss sphere on top of the newly-finished urn pedestal. 
Voila! A decorative indoor topiary


I decided to go a different route with the second urn and turned it into a candle holder (which it sorta was to begin with), but this time with a glass insert to house tea-lights only.


I actually created more moss spheres yesterday in a smaller size which I'll be using in groupings so stay-tuned to see the outcome!


Sharing this at:
Chic on a Shoestring Decorating - Flaunt It Friday
Happy Hour Projects - Freestyle Friday
Simply Designing
The Shabby Nest - Frugal Friday
At The Picket Fence - Inspiration Friday
Common Ground - Vintage Inspiration
REDOUX - Friday Link Up Party

Sunday, February 12, 2012

Budget Bathroom Lighting Makeover

Gosh, where does the time go? Yes, I've been neglecting The Frugal Tree blog but not without good reason. The main website, Frugal Interior Design needed some attention and I've been busy working on projects for The Frugal Tree at Etsy. After a few, mini-snow "storms" and completing a few home projects, I decided I had better write a post before a Search-and-Rescue party ensues for yours truly.

So, what did I do this weekend? I finally decided to do something about the lighting fixtures in my bathroom. I'm almost embarrassed to show these images. Funny how we find time to help others with their "upgrades" but seem to neglect our own.

Out With The Old


Yes, there was a time when this lighting fixture was cool. Amazing how dated it looks to me now. A few years ago, all the fixtures in my bathroom were converted to an oil-rubbed bronze finsh. My bathroom has some semi-Old World charm. Does this say "Old World" to you? "Ummmm, nah, not so much!" It was the last remaining nickel finished item in the room; albeit, rarely noticed perched up high on the ceiling, but the blue shades? I was OVER IT!!!


I can't say enough good things about this paint's finish. I was truly amazed. It actually DOES look like oil-rubbed bronze. At $8+ a can, it better be good! I was on the fence as to whether or not I was going to do this (use paint) or just buy a new fixture. I saw a rather nice one with a bit more Old World Charm, especially due to the style and shades for a mere $40.00 at Lowes, but seeing as this is a "FRUGAL" blog, I decided to attempt the spray paint process.


Aluminum foil easily covered the sockets to keep them free of paint.

The bad part of the project? Ummmm, near 32 degrees outside with snow spitting and having to work in my basement. Now I hate spray painting inside. For safety reasons, I turned off the heat, opened a nearby outside door, bundled up and sprayed quick short bursts. The house still STUNK for hours despite my efforts. This spray paint definitely has a different odor than normal spray paint but hey, it looks WAAAAAY better than regular spray paint too.

Check out the likeness between the cap color and the lighting fixture's base.

The drying process seemed to take forever and I was so antsy to get the thing back up in place. While it was drying, I decided to work on another project . . .  the crazy vanity lighting (see below). The cabinets in this bathroom were hand-made and as such, things are a bit "customized" and sometimes, not in a way we would like. The two, giant, globe light-bulbs scare the crap outta me. I've disliked them since day one. No other lights would fit up into those sockets because the hole drilled through the wood is a bit on the narrow side and these MEGA GLOBES apparently have just a narrow and long enough neck to reach (lucky me).

Well, I recently have been fascinated with the nod toward "Edison bulbs".
Clear bulbs with a vintage look in which you can see the numerous filaments. I saw the one-and-only style available at Lowes and scrutinized the diameter of the neck. Would it fit? Yes, I could always drill the cabinet holes to a larger diameter but was I that ambitious? Not really, so let's give these bulbs a try. "YAY, they fit!"

A "Scary Bulb" (left), a new "Edison bulb" (right).
Now, what kinda of shade do I want? In a lot of the applications I've seen with these bulbs, you want to "show-off" the filaments and not mask or hide the overall appearance of the bulb.

Seeing as I've been working on projects lately that utilize reclaimed, rusty metal springs, I knew a "spring fixture" would be the perfect answer. After numerous trips from the basement (my work area) to the bathroom for adjusting the metal and the mounting points on my new "fixtures", We Had Success.


These pictures make it look a bit BLAH but I'm quite happy with the outcome. It definitely seems more "vintagey" and better fits the Old World influences and colors of the space.


I can't stop running to the bathroom every few hours to admire the new look. Guess those creepy globe bulbs that reminded me of Mr. Bill's head (see the "Scary Bulb" pic a few images above) had subliminally traumatized my psyche. I'm glad THAT'S over!


In With The "New"
Note, the Frosted White shades.  "Bye, bye blue."

So, for now, a spray painted track light and a rusty spring shade make things
"well in my world".


Sharing this at:
Coastal Charm - Nifty Thrifty Tuesday
At Home With K - Terrific Under Ten Tuesday
My Uncommon Slice of Suburbia - Tuesday Treasures
The Brambleberry Cottage - Time Travel Thursday
The Shabby Creek Cottage - Transformation Thursday
Related Posts Plugin for WordPress, Blogger...