Showing posts with label Furniture Projects. Show all posts

Wednesday, March 14, 2012

Chippy Paint Rustic Shelf

As you may recall, my last adventure yielded some old, skid wood which I salvaged and turned into a rustic box. What I didn't tell you is that I also found some "authentic", chippy-paint, wood planks.   I left them there and returned a few days later to stake my claim!  After three treks back and forth through the woods, all the planks were home. What a fun work-out on a sunny and warm Spring-like day!

Here are "the goods" once I removed the numerous 3 1/2" nails and cut-off any bad end sections. At least some of the ends with nail holes were in good condition . . . (I love the vacant nail holes left in the wood for extra character.)


A bonus was that one of the planks had an old, loose (and rusted in place) latching hardware fixture. I knew I wanted to showcase that element on the completed piece.


The show-cased hardware on the finished shelf unit.

Well, here it is. Not too bad for a very "un-carpenterish" guy like myself  (" . . . Don't you remember you told me you loved me baby")


The front "apron" piece extends beyond the overall width (read more below).


Just some quick stats:

I cut (4) horizontal, shelf pieces at 3 feet and (4) vertical, side pieces at 4 feet. I created my horizontal shelves first by laying two of the 3 feet sections side by side (to add depth to the shelf) and connected or braced them together with scrap pieces of wood about 3 inches in from either end.

I did this similarly for all "sections" I created and then merely attached them together. Yes, I say merely as though it was breeze but this project took me a good four hours to do. (Pathetic, I know . . . and the carpenters on HGTV can case 8 windows, build a custom, built-in shelving unit and cut floor trim molding in a 1/2 hour show!  I'm so envious of their skills!!!)

OK, Back to attaching them. Where the sides attach to the top I used both "L" shaped brackets and corner blocks of wood. I screwed through the corner block into the top and into the sides. For the lower shelf, I again used blocks of wood which are simply screwed into the sides. These shelves simply rest on the blocks and are removable.

The wood plank with the hardware was used as an apron piece, spanning the front, top shelf. I elected to leave this one piece of wood longer than the overall width of the shelf as both ends had such great character I didn't want to lose with a clean saw-cut.  This extending piece also hides the other clean saw-cuts of the other pieces and where they connect.

Oh . . . and I added a "V" notch to the bottom of the side pieces with a jigsaw to create "legs".


Here it is staged at the front entry.

A simple mix of items with a bit of rustic charm.
Don't you just love that chippy, white paint?!

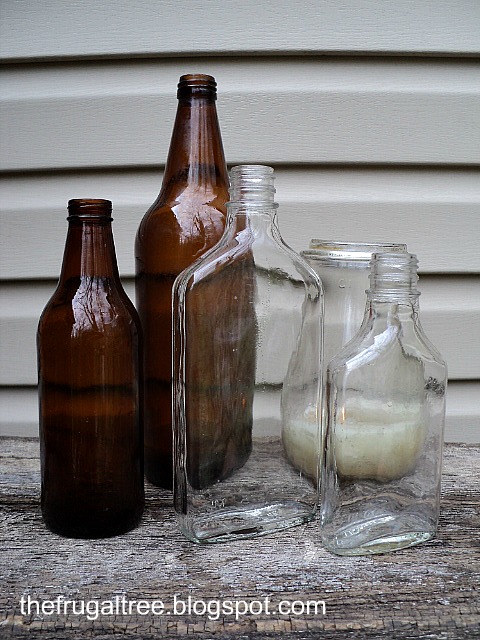
Old bottles I found while "good-deed" cleaning my road.

Old watering cans are just too cool!

A shabby lantern made from left-over. miscellaneous materials.


An iron doormat borrowed from my mother for one of my holiday displays.
Umm, maybe I can keep it awhile longer?  

The corner displaying my upcycled chimney pot with cool, twisty branches and filled with stones.

I sorta want to seal the shelf from the elements but don't want to change its appearance. Any suggestions on a good product to use? I have an oil-penetrating, clear-coat, deck sealer which I applied to the underside of one of the shelves but it made the wood darker.  I prefer the dry, weathered and faded look of the wood and don't want to lose that (too much). If I can't figure something out, this piece will be making its way indoors as a hallway console table. I really like it outside though. Thoughts?


Sharing this at:


Wednesday
Very Merry Vintage Style - Share the Love Wednesday
Restore Interiors - Restored It Wednesday
Primitive & Proper - Piece of Work Wednesday
Someday Crafts - Whatever Goes Wednesday
Savvy Southern Style - Wow Us Wednesday
Ginger Snap Crafts - Wow Me Wednesday


Thursday
The Brambleberry Cottage - Time Travel Thursday
The Shabby Creek Cottage - Transformation Thursday
Somewhat Simple - Strut Your Stuff Thursday
House of Hepworths - Hookin Up With HOH Thursdays


Friday
Happy Hour Projects - Freestyle Friday
Common Ground - Vintage Inspiration
At The Picket Fence - Inspiration Friday
The Shabby Nest - Frugal Friday
REDOUX - Friday Link Up Party
The Charm of Home - Home Sweet Home
Chic on a Shoestring Decorating - Flaunt it Friday

Saturday
Funky Junk Interiors - Sat Nite Special
Be Different, Act Normal - Show and Tell Saturday
Tatertots & Jello - Weekend Wrap Up Party

Thursday, February 23, 2012

Roadside Reclaimation

While driving home from running errands on Tuesday I happened upon a "roadside-furniture castaway". I did a quick drive around the block and pulled over to give it further inspection. I figured I would take it home as a project if it wasn't "too far gone".


A mobile, kitchen island with a broken/missing door, broken wheels, a banged up front mesh door insert and general grubby-greasiness. YUCK!

I plopped it into the bed of my truck and off I went, only 2 minutes from home, with a new project! (don't I have enough going on already?)

I immediately began working on it and cleaning it up (which took quite awhile).

I removed and cleaned all the hardware. I figured I could always purchase new hardware pending how well the current pieces cleaned up.

I removed the wheels and decided not to replace them with newer, functioning wheels, but to rather let it sit as a stationary island piece.

A new wire screen insert

The damaged door insert was removed and I began taking it apart to get the old damaged screen material removed. I pried off the wooden framework holding the screen in place (carefully), got the screen out and then cut a piece of mesh wire (like chicken wire, left over from my holiday topiary projects) to size and inserted it.  I got out the hot glue gun and ran a bead of it one side at a time, pressing the removed wood pieces back into place and sandwiching the new "screen" between. That came out rather well.

Wood "buttons" added where they were missing
A bunch of wooden plugs/buttons were missing so I bought a bag of them at the hardware store and glued them into place.

Various sized corks (available at hardware stores) create great plugs for wood furniture!
Where the second door went was an upper and lower bushing for the pin hinge. I popped out the bushing and was left with a hole. How to finish it off? Ahhh, a small cork will fit in just fine. I cut a small amount off so it would sit flush, added a bit of Elmer's wood glue and pushed it into place. Perfect!


Well, here it is, sitting in my kitchen. I'm probably going to sell it.  However, if I do decide to keep it, it will most likely get a black wash, distressed finish as the birch wood-tone is too light for the other woods in my kitchen.


Does it look O.K. with one door?  I think it sorta looks like it was meant to be. I like how the upper shelf is slatted. The grooves between each slat are perfect for bottles.


 All in all, a quick "up-do" that took about three hours and turned out quite well.


Sharing this at:
The Shabby Creek Cottage - Transformation Thursday
Somewhat Simple - Strut Your Stuff Thursday
The Brambleberry Cottage - Time Travel Thursday
House of Hepworths - Hookin Up with HoH Thursday
Happy Hour Projects - Freestyle Friday

Saturday, January 28, 2012

"Musical Tables"?

Did you know that one piece of furniture can change the whole attitude and look of a room? Forget about expensive renovations and remodels. Just give it a try if one of your rooms is feeling dull and bland. Add one new element and see what happens. It just may be the quick fix you've been needing.  Such as in this office -

From IKEA sad


TO

 Rustic-RAD!  (yes, I'm coining this new design style phrase)


Now don't get me wrong. I love me some IKEA. Where else can you furnish numerous rooms with a $500.00 budget? (and I mean that in a good way.  Good products, good value!)  It is a young homeowner's dream. I was there . . .  new home, tight funds, "HELLO IKEA!" However, that look has been with me for about 12 years now. Ya think it was time for a change?

But never fret, those "once" side tables, turned coffeetable have once again "turned" . . .

. . . into a stackable storage shelf.


Yep, I kept them in the office and stuffed them into an odd nook that was somewhat troublesome to deal with. A few black storage crates tuck beneath each. Is this considered "Repurposing"?  :-)

Stay-tuned for more details about the black "crate-esque" coffeetable that turned drab to fab!


Sharing this at:
Nifty Thrifty Things - Nifty Thrifty Sunday
Be Different, Act Normal - Show and Tell Saturday
Related Posts Plugin for WordPress, Blogger...