Wednesday, July 25, 2012

Vintage Book Press Alternative

Vintage tools are just plain cool. They emit tons of character and history, and somehow fit seamlessly into numerous decorating styles such as modern, industrial, vintage and rustic alike.  In this instance, the vintage Cast Iron Book Press is the topic of envy.


Restoration Hardware made them quite popular a few years ago and their appeal caught on and is still growing. I've seen numerous design blogs since then displaying them with confidence.  Of course, since first seeing one, I've been fascinated with their strong presence, chunky stance and vintage good-looks!

Displayed on a coffee-table

Book Presses can be a bit pricey (even the replicas), but with a little luck, another vintage tool may present itself as a worthy alternative - - - A Vintage Pipe Cutting Clamp.

A small, vintage glass bottle seems a trusty accompaniment to this massive tool.

Yes, a few months ago, I was wandering around a small-town flea market and happened upon this contraption.  I of course did not know what the heck it was at the time, but knew in my heart it would provide the same, unique look I desired of the book press.  How much?  Ummm, I figured I'd pay up to $30.00 for the piece but was stunned when the owner said "ten bucks".  I thought I'd drop my wallet in a fumbling frenzy to get my money out - - - convinced someone lingering nearby overhead the price of my soon-to-be new treasure and would jump in with a higher offer!  After handing him the money, I then inquired as to what it was.  He probably thought I was a loon (buying something without knowing what it was).  He was probably eager to NOT have to carry the beast back to his vehicle if it failed to sell.  It sure was a heavy purchase.

Appropriately placed atop a Restoration Hardware Catalog

I got it home, cleaned it up a bit with some wire brushes and WD-40 on a rag.  I think it cleaned up quite nicely and it looks perfect perched atop a pile of books.  The coffee-table is bearing the weight of the focal item well - thank goodness!

Other vintage tools and metal accents create balance and harmony

Upon writing this post (which I've been wanting to do for some time now to gloat about my find), I decided to do a little searching online.  I found one on Craigslist doing a Google search for "vintage pipe cutting clamp" as shown below.


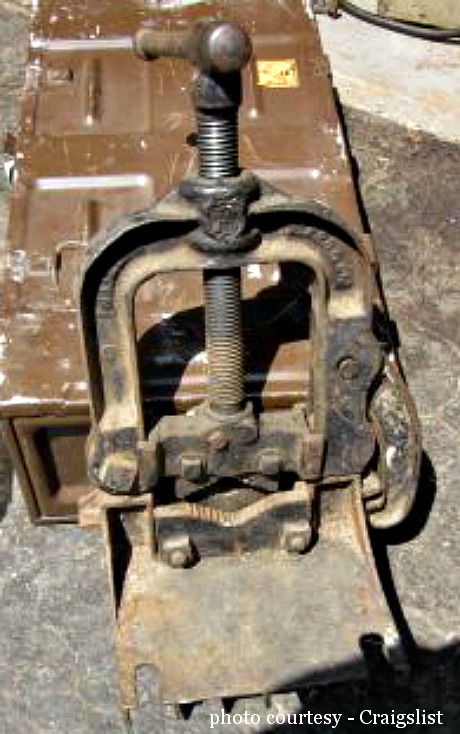
Listed on the Parsippany, NJ Craigslist for $150.00 for any interested local shoppers.
Wow, I sure got a bargain in paying $10.00 for mine!


Craft-paper wrapped books, another Restoration Hardware- inspired idea.


I love the massive crank-handle at the top

If the alternative (pipe cutting clamp) isn't your thing, Restoration Hardware still carries their replica cast iron book press and amazingly enough, I found a thriftier version at Amazon as shown below for about 1/2 the cost!


So, if you love the ruggedness of hefty cast iron and the appeal of antique tools, consider a vintage book press or a vintage pipe cutting clamp.  You won't be disappointed! 

Sharing this at:
Restore Interiors - Restored It Wednesday
Very Merry Vintage Style
Someday Crafts - Whatever Goes Wednesday
Savvy Southern Style - Wow Us Wednesday
The Brambleberry Cottage - Time Travel Thursday
The Shabby Creek Cottage - Transformation Thursday
House of Hepworths - Hookin Up with HOH

Sunday, July 22, 2012

Gold to OLD Paint Project on Pottery

So I guess this was a case of Out with the "GOLD" in with the "New" (or in this case) 
"in with the OLD".  A little old world styling that is.  


I first have to give props to Rosemary at Villabarnes as she is the master of this process. Over a year ago, I stumbled across her blog when starting my own and saw some of her work. She shared some of the supplies and  processes she used, and a year or so later, I FINALLY decided to give it a whirl. Seeing as I had all the necessary supplies on hand, all I needed was an item to rework.


Old School, "Gold" School

Sure enough, lingering back in my storage closet of "decor-gone-by", was a ceramic pottery piece with a shiny, metallic-gold fleur-de-lis. This piece had its time and day, and for many, the gold may not be an issue. Heck, I bought it and used it like that for years. I had lots of gold accents at one point. Shocking right? Of course, like 70's plaid sofas, some things go out-of-style.

I knew it would stay hidden indefinitely in its current state, but maybe switching-it-up a bit would offer new appeal.  The transformation wasn't difficult at all, just a few steps and a few supplies and VIOLA! - A New "OLD" Look!

First, I lightly sanded the metallic gold paint with fine sandpaper.  In some areas I went all the way through, in others I left hints of the base gold but tried to remove all the metallic in the paint finish (or at least dull the finish).

After a little sanding with fine-grit sandpaper

Next, I created a charcoal-color paint with a bit of acrylic black and mixing white I had on hand.  Surely, there are better craft paints for use on pottery but I used what was on-hand.

With a small, flat-tipped brush, I carefully applied the paint around the edge of the fleur-de-lis and filled it in.  To hide brushstrokes, I lightly stippled the paint (or dabbed it) here and there as necessary.  This slight texturing, along with the sandpaper strokes and paint layers & finishes beneath, create the perfect "base" (if you will) for the final step.

I somehow forgot to take a picture of this step, but  imagine a charcoal fleur-de-lis at this point. 

After the paint dried, I added some gesso medium with a slightly larger brush.  I pretty much covered the entire fleur-de-lis and then went back over it (it dries fairly quickly) with a soft cotton rag, wiping or buffing some of the gesso back off.


After applying gesso.
Note how the texture becomes quite pronounced at this stage.

You can keep working this step over and over to achieve the look you want.  If you wipe too much off, apply a bit more gesso and begin wiping it off again.  Buff to blend the finish to the desired look.


After lightly buffing the surface with a soft rag to remove excess gesso


Here are the supplies I used.  This project took about an hour so it's a quick redo for anyone!

*Addendum - The entire piece was covered with a Clear Acrylic Sealer in Matte

Sandpaper, brush, paint, gesso and a "rework item"


HAVE FUN!


Sharing this at:
Nifty Thrifty Things - Nifty Thrifty Sunday
Keeping It Simple - Motivate Me Monday
Boogieboard Cottage - Masterpiece Monday
Sumo's Sweet Stuff - Market Yourself Monday
Coastal Charm - Nifty Thrifty Tuesday

Thursday, July 19, 2012

Shabby Industrial Upcycled Sign

A few months ago, I found some rectangular pieces of galvanized scrap metal which I figured would be perfect for some sort of upcycled or repurposed project. I'm not sure what their original use was, but they had a great folded overhang on the backside, perfect for attaching them to something.

My Upcycled, Scrap Metal Sign.  A unique addition to the front entry!

While scrounging for cool metal scrap, I also found some rusty patina, decorative, "old school", landscape edging/fencing. Remember that stuff?  However, it was falling apart and broken into many pieces.  I figured the neat, squiggly shape of the metal would be great for numerous types of projects. In fact, I originally used those squiggly pieces to create the metal accents for my glass candle holder project (below).


My first use of the squiggly metal pieces were for this candle holder.

With lots left over, I decided to try shaping the pieces into letters. Some pieces were so brittle, they broke when trying to manipulate. However, I was able to achieve a fun, home-loving, catch-phrase . . ."DWELL".


I placed my letters out upon the flat, galvanized piece and with a fine-tipped, black Sharpie marker, began marking dots for drill locations. I drilled on each side of each letter (piece of metal) at both the top and bottom of the letters (or anywhere else necessary to provide good attachment of the letters). I used a fine drill bit with a regular impact drill but a Dremel would surely work as well.


The galvanized metal provided a great, weathered patina for the background.

Be sure you drill on a surface that the drill bit can run into (or through) such as a wooden work bench.  I even use a large, rectangular, plastic, storage tub as a drilling surface for smaller, crafty projects such as this one.  The drill bit runs right through the plastic, eliminating a broken bit (fine or narrow drill bits break easily).  

Be sure to wear Safety Glasses when manipulating rusty metal and when drilling!


A drilled hole to the left and right of the "W" center-point
helps hold the pieces together plus attaches them to the base metal.

Fine jewelry wire in bronze (from Michaels) was used to attach each individual piece to the base metal.  I looped the wire from each left-to-right hole (per metal piece) twice, and then twisted the wire snuggly on the backside. I used wide electrical tape (seen below) to span over each twisted "braid" on the backside so the finished sign would not scratch any wall surface it may hang against.


Wide tape covers the twisted wire locations on the backside of the sign.
It helps protect the wall and you.

Since the piece had the folded-over edge (or overhang) on the backside (seen below), it was easy to wedge a "hanger" of sorts into place for hanging the sign. I actually used a long piece of the same wavy metal from the fencing and carefully shaped it with various flat and needle-nose pliers.  For all who do not have access to such metal pieces, use wire coat hangers.  You can shape one similarly as I've done to create the arched hanging point. Using cutting pliers, you can also cut wire hangers into smaller, workable pieces for creating letters.  Grab them with a pair of cutting pliers where you want to create a break and begin moving the wire up and down until it breaks.  You will have to undo the top braided hook of course beforehand.  Again, wear Safety Glasses!  With the correct type of pliers you can even cut right through the hanger.


The bent metal extends about 1" inward (under the folded edge) from each side of the sign. 


VOILA! A Unique Rustic, Repurposed, Shabby, Industrial, Upcycled Sign 
(or whatever other Style Term seems appropriate . . . "Recycled" perhaps?) 


I had it hanging in my kitchen for quite awhile, but recently decided to move it outdoors to top off the newly added "arbor-esque" beams for my stone, entry columns.


The beams were previously landscaping beams for defining beds. I've had them for about 8 years, used in their intended capacity. When I restained my decks and other, outdoor, wood accents in espresso earlier this year, I felt something needed to be added to the columns to tie the overall look together. The addition of the stained beams was the answer.


The dark espresso really makes all the other surrounding colors more vibrant and really creates a nice finished look. Of course the "DWELL" sign was the fun, finishing touch and it looks 'right-at-home' in its new, outdoor location!

Sharing this at:
The Brambleberry Cottage - Time Travel Thursday
The Shabby Creek Cottage - Transformation Thursday
Somewhat Simple Link Party
At The Picket Fence - Inspiration Friday
The Shabby Nest - Frugal Friday
Funky Junk Interiors - Saturday Nite Special
Rustic Crafts - Rustic, Recycled and Chic Link-Up

Tuesday, July 10, 2012

Upcycled Outdoor Lantern

I've been saving a bunch of jars for quite awhile and decided to finally put them to use. Since I recently reworked my deck, I felt it needed some updated accents to accompany the new stain and railing colors. I visited numerous stores looking for torches and lanterns but could not find what I wanted.

If you can't find it . . . MAKE IT!


An upcycled pickle jar was used for this particular lantern.


Decorative shell-like accents are spaced around the glass and adhered with E-6000 adhesive.
The upper ring clamp, which keeps the coir roping in place, is a salvaged piece of metal mattress spring.


The "S" hook and hanging hoops are crafted from pieces of rusted, reclaimed mattress spring as well.  The coir rope ends are wired together by weaving paddle wire around them.  Hot glue is added and covered with wrapped jute twine to hide the wire  Wiring the rope creates a sturdy anchor point for the hanging hoops to "pull" against.


More accents hang from a knotted strand of jute twine.  They are attached via hot glue.


Citronella tea-lights will illuminate the night and keep bugs at bay.
NOTE:  I suggest spraying the coir rope with flame-retardant where it extends above the top of the jar.


The earlier mentioned "S-hook" from which the lantern hangs can be seen here (if you look closely).


USE IT INDOORS TOO
Of course, if you don't want to deal with flames, choose to use flame-less candle votives (indoors or out).  
This allows it to be safely hung for indoor use and minimizes any potential hazards or concern.


A nice accent hanging from a doorway OR . . . 


. . . Hanging from a rustic shelf.


Here are the supplies used for this project in no particular order
1) glue gun
2) E-6000 adhesive (or similar adhesive)
3) empty glass jars
4) coir rope
5) jute twine
6) shell or similar adornments
7) paddle wire
8) heavy gauge wire or something similar to the metal spring I used - pieces of metal coat hanger perhaps?)
9) various pliers to pry, bend and shape the metal elements


I like using cheap aluminum baking sheets for projects.  They are good for placing glued items upon for drying or for dumping out shell accents (as seen here) to find just the right-sized piece!


The shell pieces I purchased in ivory tones as well as turquoise (seen in the closed bag).  These were seasonal at Michaels but they may have something similar year-round.  The E-6000 and thin silver paddle (or floral) wire was also purchased at Michaels.  Jute twine and coir rope can be purchased at most hardware stores or in hardware departments.  

Here is how I started my jars.  Hopefully you can figure out what I did from the images above.  I did not take step-by-step images as I wasn't planning on sharing this project. 

I first cut 3 lengths of coir rope and placed them out on the floor, overlapping each piece at a center point and spacing them to create equal wedge shapes.  Weigh-down the ends of each piece or rope to keep them anchored and in place as you work with them (as discussed below). 

Once you have equal wedges you will want to connect the pieces together at the center point.  I cut a length of thinner jute twine about 2 feet long and slide it under all 3 pieces of coir, making sure I had an equal amount of twine to each side of the jar.  

I then began weaving it in and under the pieces of coir rope and criss-crossing it over the center of the rope, weaving in and under, and criss-crossing over again and again until all 3 pieces of coir rope were secure to my liking.  About 5 inches of jute twine ends were left hanging.  I knotted the two pieces together over and over to create the hanging "braided" look.  I left about 1/2 an inch un-knotted at the end for the central, hanging-shell adornment to adhere to.


In the above image, the 3 pieces of connected coir rope now create (6) "straps" that will wrap up the sides of the jar for hanging.  The center has been attached via hot glue however I would choose to use the E-6000 for my next lantern as hot glue has a tendency to peel off of smooth glass once it cools.  Seeing as these may hang outside in the hot sunlight, I don't know what effect that may have on the hot glue either. 

For the rest of the project, I clamped the (6) pieces of coir rope at the top of the jar with the metal spring clamp and adjusted them to make them as vertical as possible.  I glued shell accents between each section of rope with E-6000 adhesive.  TIP:  Keep a roll of scotch tape handy and tape a long piece over the shell (or accent of your choice) and onto the glass of the jar to hold it in place until the adhesive dries.  Fold a corner of the tape itself for easier removal from the glass.

That's pretty much it.  Oh, and you may want to make sure the jars you choose have wide enough mouths to get your hands in for placing candles.  I find you can drop a tea-light into narrower jars and center them with a long stemmed lighter before lighting them.  If the bottom of the jar isn't flat, you can add a small amount of sand to level it out or even add other small accents with the sand such as mini seashells.  

**Tomato sauce jars are great for this project!

Perhaps I'll share a few more as I complete them.  I'd like to do a few "variations of the theme" and group them together at various heights around the deck.  It should create some nice outdoor ambiance.  
Read more about my Upcycled Jar Lanterns.


Sharing this at:
Coastal Charm - Nifty Thrifty Tuesday
My Uncommon Slice of Suburbia - Tuesday's Treasures
Debbie Does Creations - Toot Your Horn Tueday
Someday Crafts - Whatever Goes Wednesday
Ginger Snap Crafts - Wow Me Wednesday
The Shabby Creek Cottage - Transformation Thursday
Be Different, Act Normal - Show and Tell Saturday
Related Posts Plugin for WordPress, Blogger...