Saturday, August 3, 2013

Industrial Spring Book Rack

While visiting an auto scrap yard last weekend, I stumbled upon (quite literally) a large coil spring. The spring was from the front suspension of a full-size truck. While walking around, I began seeing many more. Could I have found the treasure trove of industrial elements to repurpose? I think so! Flywheels and other neat cogs and gears were also littered around the yard, waiting to be reclaimed. So many ideas came to mind...welded sculptures, wall art, table leg ideas, etc.

After handing over $5.00, I left with my cool industrial element full of character and rusty patina. I enjoy using such items simply as decorative elements much in the manner of Restoration Hardware. I'm often impressed with the creative minds behind their room staging. Many, "why didn't I think of that" thoughts cross my mind in awe when I flip through their sourcebooks. Nonetheless, I'm often impressed when I come up with some clever ideas of my own (who isn't?)

Industrial Spring Book Rack
Junkyard Auto Suspension Spring Repurposed

In its simplest form, this big spring could be displayed on its own as a decorative focal feature. After a day of that, I decided to stand it upright and place it carefully over a cleaned out yankee candle jar with a lit tealight within.

Used as a candle display?

That look was O.K., but I ultimately decided to give it more of a purpose...as an industrial book rack.


Simple Style


Free books wrapped in brown craft paper and lightly roughed-up with sandpaper unify the look.


One end of the spring tapers and winds smaller as a decorative scroll-like element.


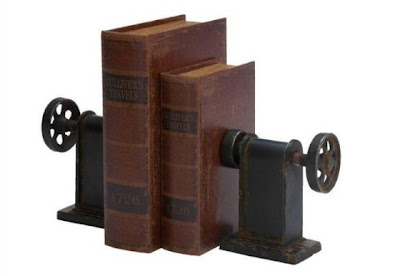
I often see unique items used as industrial and/or rustic bookends, 

Old Pulley Bookends
Courtesy of Home Decorators Collection

OR

Vise Bookends (available at Amazon
Courtesy of Home Decorators Collection

so why not expand on that idea of propping up books but in a more unique manner?

Although not able to stack or hold a volume of books, my big industrial spring creates a clever tabletop feature similar to the use of a vintage wooden vice for displaying books (below).  

Wooden vise from local antique shop
repurposed as a book holder.


Other ideas for the spring?  Well, I could see it spiraled around 
the exterior of my wine bottle pendant light! (click the link to see how I made the light below)
While you are visiting the main website, be sure to "FB Like" Frugal Interior Design!  


Can you envision it?  I think that would look neat.  

I guess I need to take another trip to the junkyard soon!


Sunday, July 28, 2013

Easy Poster Frame Art Ideas

The offices where I work have different colored accent walls.  A bright limey green, a dull medium blue, and a peachy-orange.  I ended up with peachy-orange.  I've been staring at this orange wall for almost a year now. In fact, the wall they painted as the accent was the wrong wall in my opinion.  You do not see it when you walk into the room.  Instead, you see the other surrounding plain off-white walls, devoid of art and interest.

I've neglected to repaint it (yes, we can choose one of the other colors and paint it ourselves if we want to). Everybody tells me I need to put something up!  So, I finally decided to resolve this "problem" with some artwork. Seeing as I mildly dislike painting even the walls of my own home, I really did not feel the need to undertake that task at work.

A few months ago, one of my co-workers received a gift that had lots of bright orange tissue paper inside. She was in the process of disposing of the wrappings and paper and I said "Oh wait, I can reuse that!"  I took the orange tissue paper home, knowing I would use it somehow to create complimentary artwork for my orange-accented office.

And here it is!
Simple artwork #1
I have numerous old poster frames from when I was in high school.  Yes, they are VERY OLD! They were probably only around $5.00 back then.  Now, you can get similar poster frames with much nicer slide on edges and borders of thicker and chunkier dimensions, making them look a bit more expensive and grand. However, I'm quite pleased with the end result of this project and saved some bucks by not "spluring" on the newer frame types. 

Some $0.69 poster board creates the white background for these piece.  A leftover piece of black poster board from a previous project creates the next insert which I simply have taped into place, and finally, some prints (copies) I had made on gloss paper of pen/ink art I had done last year. Lest we forget the reuse of the orange accent tissue paper . . . I crinkled it into a ball and then carefully smoothed it back out, folding it into a long narrow band which I wrapped around the backer-board of the poster frame (a 20" x 28") and taped to the backside.  


Here is the other one!
Simple artwork #2
I actually put this one together first (despite my caption naming and presentation order).  This poster frame is actually larger than the other (24" x 36"), so it took (2) pieces of black poster board to create the background color.  Once I had those two pieces cut to size and meeting in the center, I taped them in place. Next, I crinkled up the tissue paper, smoothed it out, and folded it into wide bands.  I figured out my spacing, wrapped them over the backer-board of the poster frame and taped them in place.  More artwork I had done last year was printed out on heavy-stock paper, positioned, and taped into place.  I really like the graphic boldness of this piece.  I may actually hang this one horizontally.  That's the nice thing about this artwork - it can hang in any orientation.  

I can't wait to hang this art at work tomorrow morning.  It will be nice to finally pull that orange accent color to the other side of the room through the use of this artwork.  I really think it will give the room a whole new feel and the unity it currently lacks.  

Here are some of the "before" stages of this art:  

The poster frame (wooden backer-board, plexiglass front
and press-on black plastic frame pieces)

Black and white poster board ($0.69 at Dollar Tree) and
leftover/salvaged orange tissue paper (use any color you like!)

Crinkled and foiled tissue paper spacing being determined (a nice accenting element
which provides a color pop and some texture/interest to the final art piece.

Each of these completed pieces cost less than $10.00!  Not bad for some custom art!  You can create art like this easily.  You don't even have to make your own graphic images.  You can purchase paper (by the piece) with graphic designs at Michael's to create a similarly styled look and effect. 

 Now, have some fun and keep it under $10!   :-)


Saturday, July 20, 2013

Bottles & Burlap & Baskets (oh my) - My Thrifty Finds

A few weekends ago, I visited Tollbooth Antique Market.  I saw LOTS of items I wanted but left with one reasonably priced amber bottle.  My collection of amber bottles is growing and I'm probably done for a while.  I must say, the size of this one grabbed my attention and of course, I could not leave it behind.  It stands near 14.5 inches tall.  I had never seen one with such height before.  For 10 bucks, it was coming home with me.

The smaller one, which my mother found and gave me, is a pretty nice size too.
It looks dwarfed beside my "new" super-tall find!

I'm not sure if I shared these finds before, but I was at an antique tractor show late last fall and scored the below two items.  The amber bottle is very unique and looks handmade.  It has unique flaws (such as a slightly bent neck) and plenty of etching and bubbles in the glass.  It even has a totally flat bottom which I thought was interesting.  It stands tall too (at 13 inches). For a mere $3.00, I grabbed it!  The old block n pulley (I've been wanting one of these for ages) was a reasonable $8.00 if I recall.  Not bad for some cool vintage finds!

Old wood, metal and glass; my favorite elements!

After leaving the TollgateAntique Market, I visited another small-town thrift shop in Red Lion, PA called Treasure Trove.  It's definitely more "thrift" than "antique" but every now and then you can find some great items, such as this old metal (zinc) basket.  The lady who owns the place told me it was an egg basket. I wasn't sure if it truly was, but we'll go with that.  I loved its industrial look and knew it could have many uses. With a $2.00 price tag, I claimed my price!

My industrial bin/basket.

Now, it didn't have that handle, but I thought it needed one.  Seeing as I was told it was an egg basket, I figured "why not?"  Seems more "basketly" with a handle.  I have this older plastic trash pail that I use outdoors to collect leaves and debris as I go around the property.  It's been falling apart after many years of hard use and this metal handle recently popped off.  I figured I could find a new use for it - - - AND I DID!


My first use for the basket?  Towel storage & display!

And here is one more item I got months ago but never shared: a burlap sack.  I have two now and use them in similar ways.  I always look for ones with unique lettering and text.  I like how it breaks up all the black of my big sofa by being thrown over the center cushion.  It helps the sofa tie in with the vintage wooden elements dotted throughout the space.

Burlap sack as simple throw.
Lots of vintage elements for an industrial look.

Oh, this sack was $5.00 at Hometown Antiques (aka Angie's Country Corner) in Red Lion, PA.  This place has great items, but a bit more pricy and typical of true antique vendors.  Now, my second burlap sack (below) was a mere $1.50 at one of our Restore York stores (part of Habitat for Humanity).  I actually prefer it to the more "expensive" one because I love the large block lettering and numbers across the center.


Old burlap sack laying over a couch cushion.

Here you see how the black font on the burlap ties in nicely with the
black accent wall and black crate coffeetable in my office space. 
Anyway, that's it for now.  I'm running out of room for my vintage finds!  
Until next time, happy treasure hunting!

Thursday, July 4, 2013

My Day at Tollbooth Antique Market

I finally decided to venture over to Columbia, PA to check out the Tollbooth Antique Market.  Numerous folks have told me how great it was and that has gotten better organized.  I was told it had two levels and was inside an old warehouse - (enticing combination) - I envisioned "miles" of vintage finds before my eyes . . . I wasn't disappointed.

 What Did I See?

These could definitely fit among the "objects" of  the Restoration Hardware catalog. 
I'd prop them both in a corner similarly to how they were placed here.
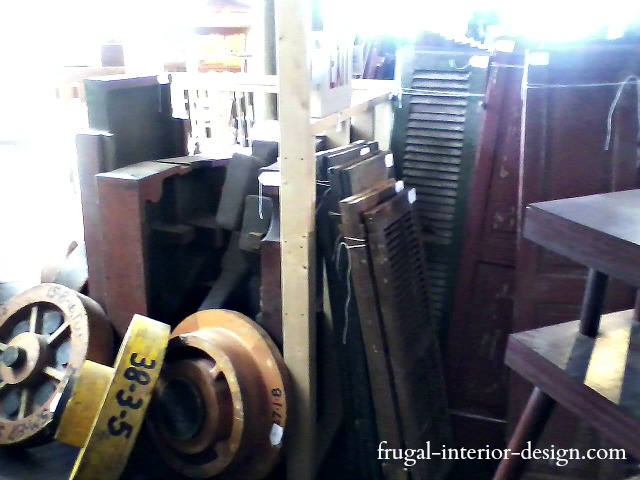
I forget exactly what these were called on the ticket - perhaps factory pulleys of some sort.
I think I need both of them!

Lots of old shutters (solid, paneled, louvered) - what I could do with some of these items!


Stained glass windows . . . I favored this arched one.
The chippy green chair would be great somewhere on my property too!


I love plain ole paneled windows like these.  I've seen them repurposed in so many clever ways.
I'd hang this one with eye-hooks and chain in front of a large picture window.
See these Repurposed Old Window Ideas 

I loved this old door.  It was some odd creamy/light green color with the old plate hardware (minus  knob).
Perfect as a table, hung as art, or hinged to other similar doors to create an indoor or outdoor divider.
(I know folks who would grab that little desk too!)


I LOVE these old pallet carts.  They are quite popular as industrial coffeetables.
I think I'd still consider one as such after seeing this one up close!


COLUMNS ANYONE?
Imagine using these to define a dining area within your home.  Or, even using them outside in so many ways - topped with spilling/trailing plants or placed in four corners of a patio as the base for a pergola.

This old bench/pew was super high off the ground.  I loved its "grand stature."  I'd replace my formal living room sofa (since nobody sits on it) with this.  Just add a few cotton and burlap pillows for a relaxed, casual, shabby look!

I could easily spend a thousand bucks in this place!!!  
(the prices were not bad at all - some were crazy reasonable!)
I was somewhat salivating at all that lay before my eyes!


A neat cubby-shelf.  I know many of you like these things.
Not sure how I'd use it in my current home but thought it was very cool!

I LOVE ME SOME VINTAGE BOTTLES! These big ole glass carboys were reasonably priced.
I purchased a smaller amber bottle which I'll post about later.

Lots and lots of old soda crates.  I know many of you enjoy repurposing these as well!

I went back to this trunk at least 4 times but left without it cuz I'm simply running out of room.  So sad!
This old military wooden trunk was in a flat, faded gray color and had block-stamped identification of  its previous owner.  I envisioned it on tall legs to create a bar height kitchen table or even on short legs to use as a coffeetable.  It had a nice, low-profile height . . . oh, and old leather strap handles!!!  Hmmm, if it's there next time . . . 

Another great ole low-profile trunk and lots of vintage graniteware strewn throughout the place.

Great color and character!

Columbia, PA right off the old Rt. 462 bridge from Wrightsville.
I had a great time and browsed for a good 2 hours or more (I could spend a day in there).  They have a little cafe area with homemade baked good and beverages too.  The people were very friendly and I'd definitely recommend the place.  There were lots of smaller vintage items too but if you know me, you know I'm drawn to certain industrial/rustic elements (glass bottles, rusty hardware and tools, old doors and windows, etc) and I found lots of them here . . .more than I've ever found at any single place in this area.  

I've seen other blogger friends discussing antique markets in their areas and I've always been envious.  Now, I finally have a local place of "my own." Check it out if you're in the area!  

Saturday, June 8, 2013

Reclaimed Barn Beam Bench

I finally got around to creating my reclaimed barn beam bench.  Truth is, I kind of settled on this as a temporary solution while determining exactly how to use this beam.  The result was a bit better than I had planned (at least in my eyes), so it may be pulling duty as a bench/console table for some time.


My step-father was lucky enough to happen upon someone tearing down a barn and disposing of the wood. He collected many wonderful pieces, this being one of them.  When I saw the chunky thickness of the piece, many ideas flooded my head: bar, coffeetable, bench, fireplace mantle.  Thankfully, the piece was given to me so I could experiment with my many ideas.  The long piece even looked neat propped-up in the corner of a room for a short while.

Vintage Salt Glazed Pottery

The nice thing about this project was the ease of its construction.  It's simply a vintage barn beam on supports. Coming up with ideas for legs or a base was problematic at first, but I'm pleased with what I found for this purpose.  Of course, the perfect accessories pulled the entire look together and the lower height and narrowness of the piece opened up the space.


View more images and learn more about this 
simple, reclaimed barn wood bench.

If you liked this project, read about my chippy paint rustic shelf (shown below) 
made of discarded barn siding found in a wooded area! A tutorial for this shelf will be coming soon!

Chippy Paint Rustic Barn Wood Shelf


Thursday, May 23, 2013

Easy Driftwood Mug Tree Stand

I found this cool piece of driftwood a few months ago; you may recall my Springtime Driftwood Table Display. Well, the time had come to switch things up a bit and the table display has recently changed. The driftwood with its many pointed appendages was too cool to pack away.

Other unique limbs and branches are already on display throughout the home, so finding the perfect spot for this piece proved difficult. Seeing as I have a rather large kitchen with high ceilings and minimal organic accents within it, and because I had grasped the wood and was carrying it vertically with its stubby branches pointed upward, an idea suddenly materialized . . . a tree stand for my coffee mugs!  (and perhaps the numerous mugs in the sink waiting to be washed helped spark the idea too!)


A Found Piece of Driftwood Becomes a Mug "Tree" Stand


This piece of wood did not have the flattest base on which to set it upright.  In fact, getting it to stand vertically proved somewhat difficult.  I actually grabbed some old rusty nails I reclaimed from some barnwood and hammered them into the base of the "trunk" at an angle - almost in an attempt to create a tripod of legs.  It took some adjusting to get the balancing just right but it finally happened.


Rusty Nails Hammered into the Base Help Balance the Driftwood

This method is fine for now but I do plan on encasing the bottom 1 1/2 inches of the branch base into a round concrete form to provide more weight and better support.  I typically get round brown-paper craft boxes at Michael's to use as concrete forms for such projects. (a square base is an option too, in which I use the bottom half of a milk or creamer carton for the form)


A Perfect Display for a Deep Corner

This deep corner seemed the perfect spot for adding height and some organic flavor.  The earthy branch stands in stark opposition to the cold stainless accents, but harmony is oddly achieved.  I love mixing modern styling with organic items to create such scenarios as that above.

So, if you happen upon a piece of driftwood, fish it ashore and take it home.  You never know what unique uses may come of it!

Sunday, April 28, 2013

Repurposed Burn Barrel Plant Stand

I finally got around to "redoing" the front entry for Spring 2013. In the past, I have used inverted birdbaths to create height for plants in this corner. Since I've done that a few times before, a change was needed; perhaps something a bit more in-your-face.

Repurposed Burn Barrel
Rusty patina barrel repurposed as a massive plant stand.

This barrel, found on the property, was never actually used for burning.  In fact, both ends are intact but the contents are long gone.  Going this route provided a bit more rustic-industrial design.  I didn't like the openness of the fern's pot sitting atop the barrel, so I arched an old grapevine swag around the front half to mask it.  The grapevine adds an organic touch that plays off the river rocks surrounding the base.

Speaking of grapevine, my first idea for this barrel was to fully wrap it with grapevine.  I have a huge doorway arch that I created a few years ago with fresh vine, but it simply got too dry and was unworkable for wrapping around the barrel.  I'd still like to give that a shot at some point.

To the right of the barrel, I located three varying height pieces of scrap wood which I bundled together with rope. These pillars provided the perfect location for my house-numbered wine bottles. (Option: paint larger house numbers on the barrel instead - vertically would really look neat!)


House-Numbered Wine Bottles
House numbers painted on old wine bottles.
(I take these in each night to inhibit water getting inside - I could cork, but I like the open, simple look)
Invert them instead (before painting) and you can stick the neck in the ground as the display support. 
See how I made my numbered wine bottles here.

Leaning against the barrel is an old truss fence post I found alongside the road.  It has cut-out pockets and holes where other members or beams would have attached.  Those cut-outs could be neat for future creative uses.


Repurposed Chimney Pot
A chimney pot, placed on the ground, is filled with dirt and new annuals.
For a less messy approach, place enclosed containers or planters within (this is what I did when it was on a deck).

How fitting that a chimney topper, often referred to as a "pot", is reused as a pot for plants!  I did this a few years ago on my back deck but seeing as I have two, I decided to flank them on each side of the main entry this year. I think the terra-cotta color stands out nicely against the gray-brown hues of the stone columns (and it ties-in with the rusty stuff I have dotted around the property - like the burn barrel!)


Repurposed Items Galore!
The spring 2013 front entry

Besides repurposed chimney pots as planters, old landscaping beams were cleaned up, stained espresso, and span from column to column.  Pieces of scrap metal were used to create my "Dwell" entry sign.  An old galvanized pail with a rusty patina has been placed atop the beams and houses some Begonias; its central location really makes an inviting statement!

See how I made my "Dwell" scrap metal sign here.


Rock Stairs
Large stones create steps to an upper-level outdoor living space.
Yeah, not really a "repurpose" or anything out-of-the-ordinary, but I wanted to share this picture since I just mulched yesterday and it was not the most exciting chore in the world.  I really love how vibrant the greens pop against the dark brown mulch, however.  Three planters offer a nice visual statement and provide some early-year color with Begonias and Impatiens.  Another old fence post (given to me) has been placed on a rock wall as another element (for now).  I like its faded, weathered finish with some mossy-green growth.  

I hope your outdoor spaces are well underway and are coming together nicely.  I have lots more to do to get "caught-up."  Heck, I still have leaves to rake in some parts of the property.  YIKES!  For now, I'm enjoying the way the front entry is shaping up and am loving my rusty repurposed burn barrel plant stand!

Related Posts Plugin for WordPress, Blogger...